Notes: Strong route-finding skills are key to keeping the grade moderate. Hot, smoky day, no water on route.
Trip Report
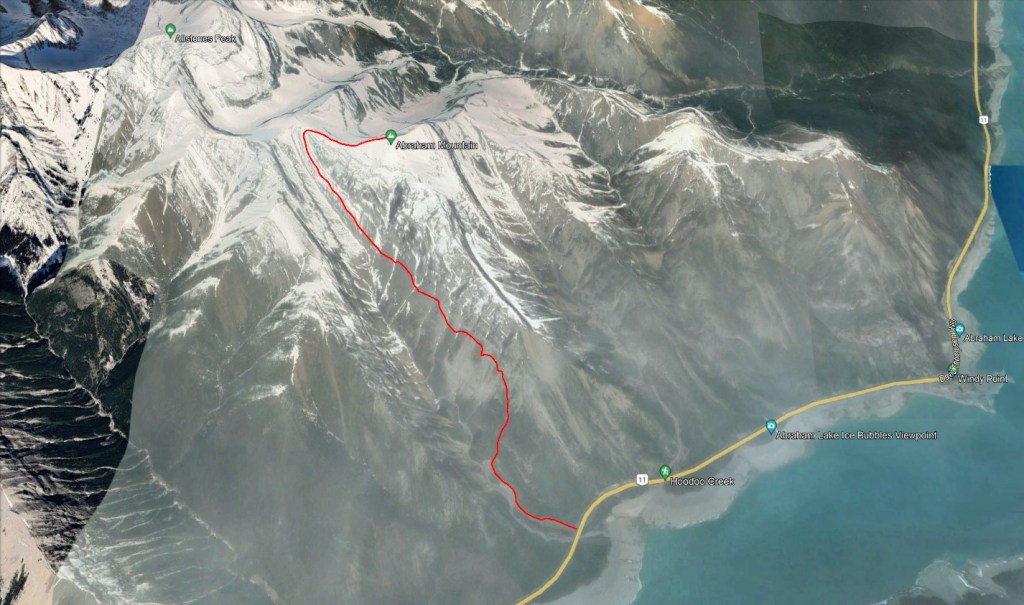
Abraham Mountain is perhaps the most captivating peak in the David Thompson Corridor, the “crown jewel” of the area. It had been on my radar for a few years, but conditions never quite lined up with my schedule. Nearly perfect conditions on a Friday I had booked off in August 2024 finally offered me a chance to visit this beauty of a summit.
The start described by Pawlyk uses the approach trail to the Abraham Slabs climbing crag. Having hiked this approach several times over the years, I was interested to see if DeWit’s creek approach was as fast as boasted. In retrospect, I think the two lines are roughly equivalent. Pawlyk’s line might be easier to navigate. I will follow DeWit’s creek start here.
Based on experience at Abraham Slabs, sheep seem to enjoy hanging around the upper slopes and make sport of kicking rocks down at climbers. With this in mind, I kept my helmet on any time I was near the cliffs. With the presence of sheep I would also expect ticks. I didn’t find any on this day, but have seen plenty around neighbouring Windy Point in Spring.
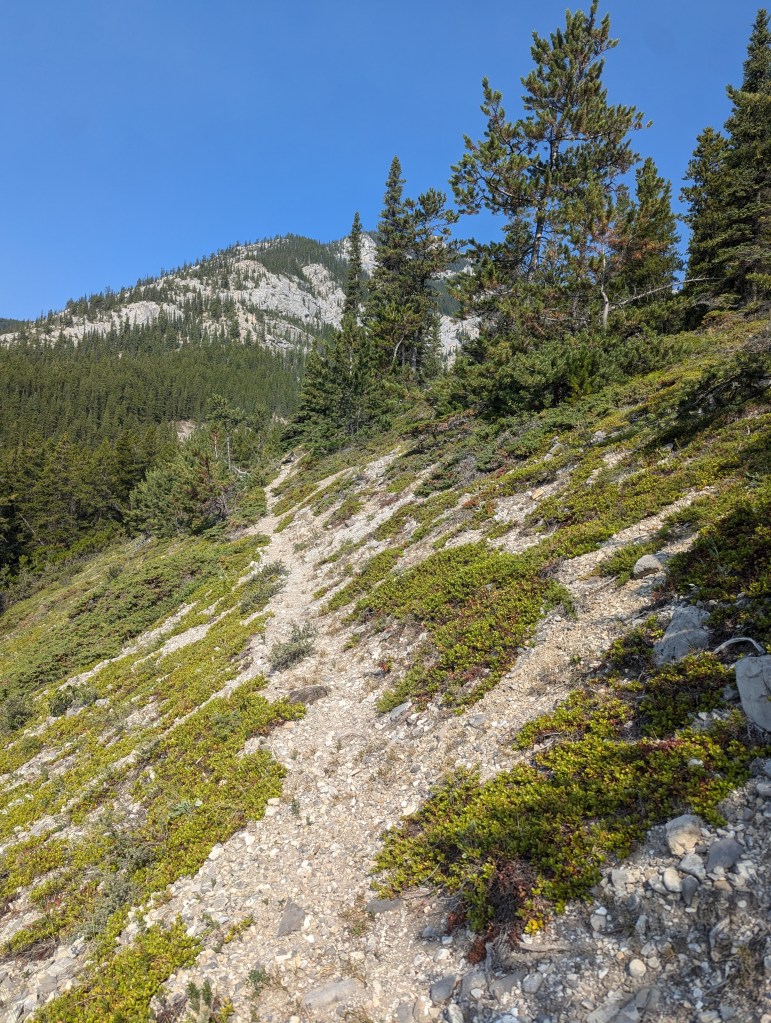
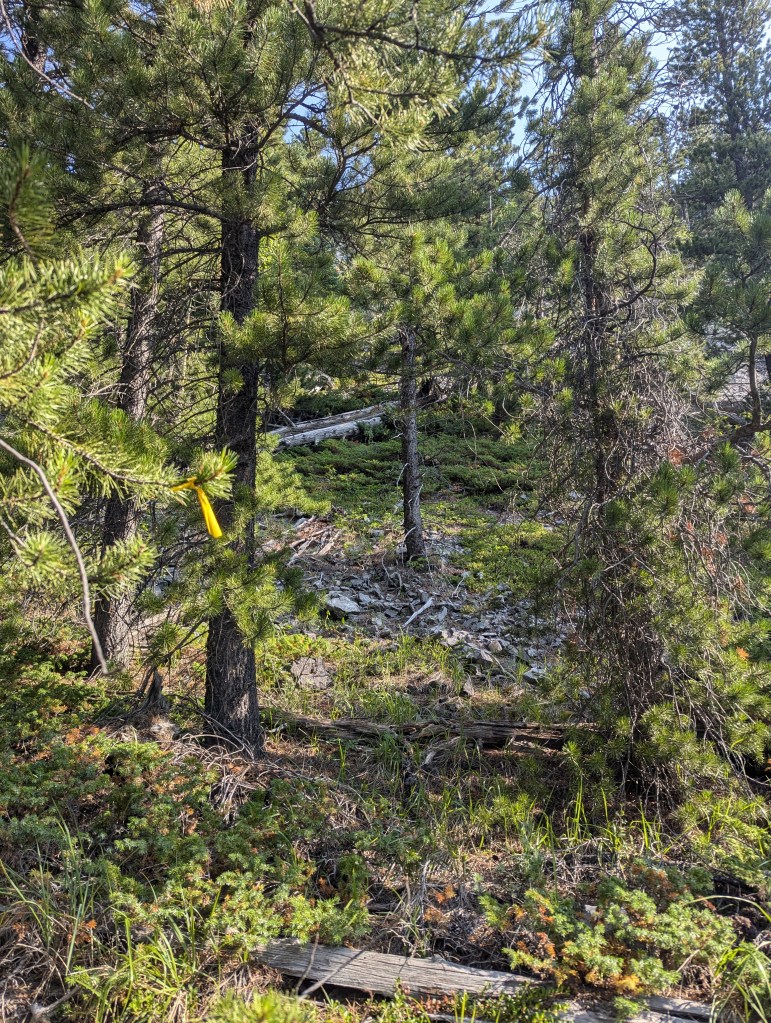
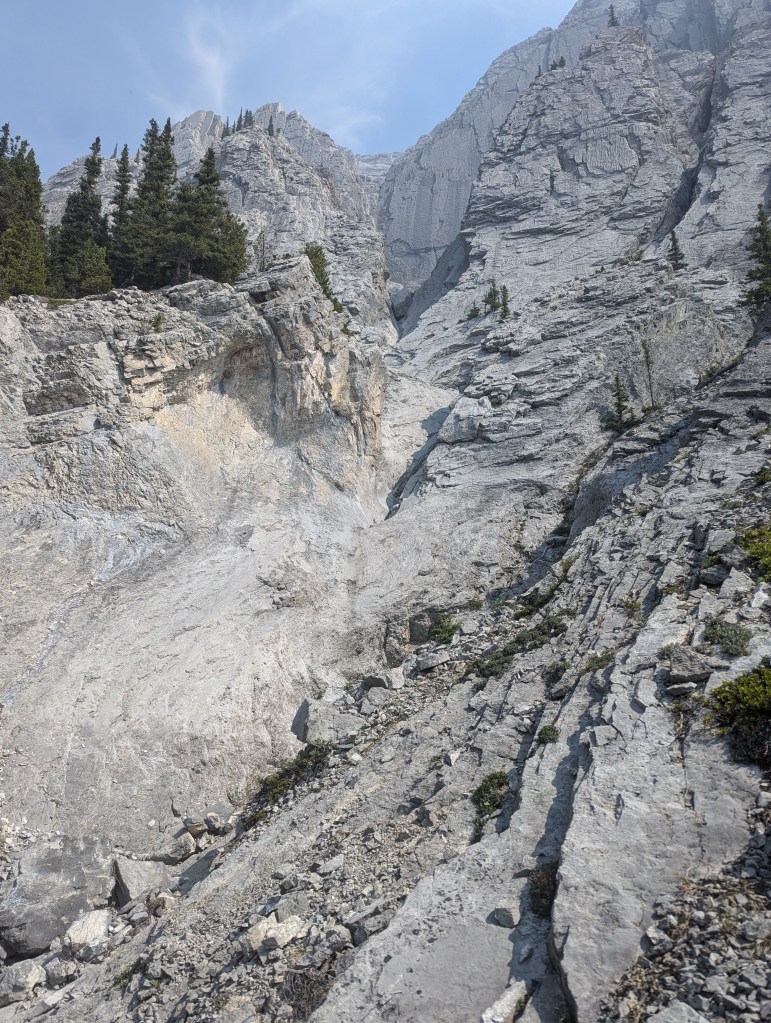
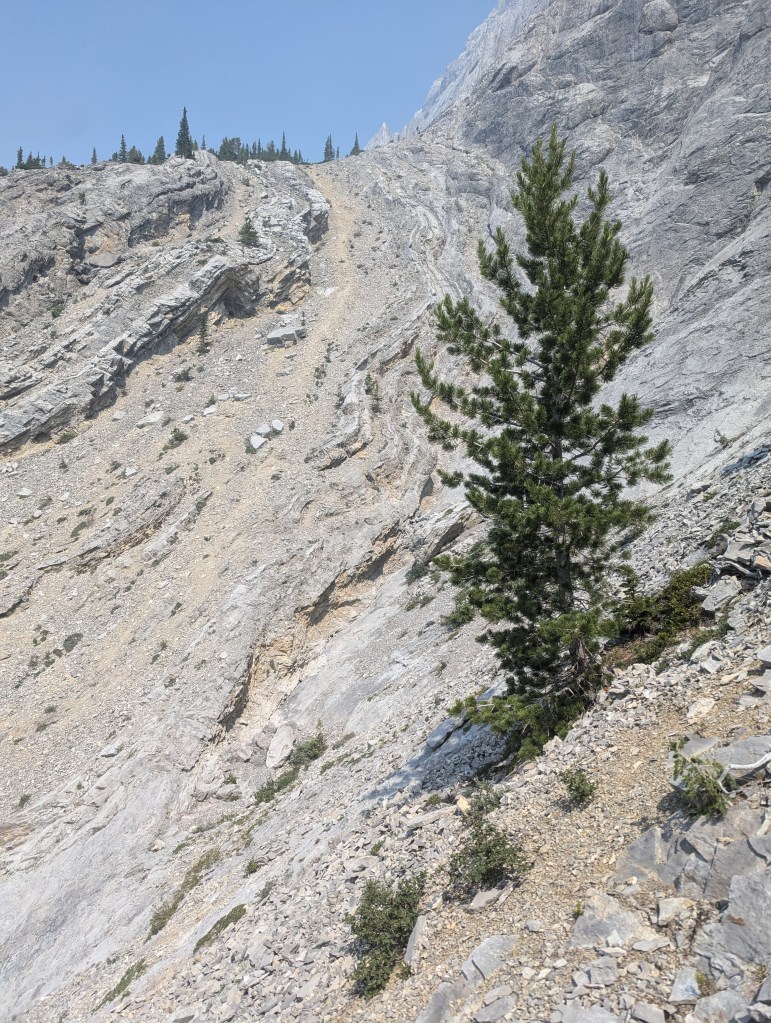
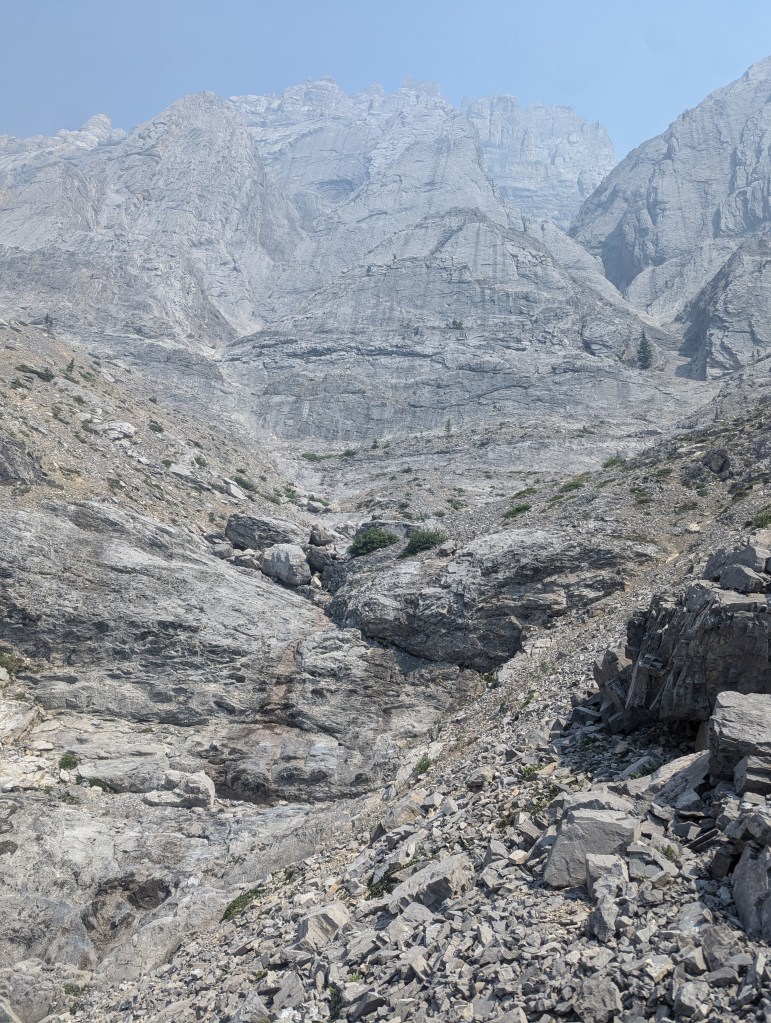
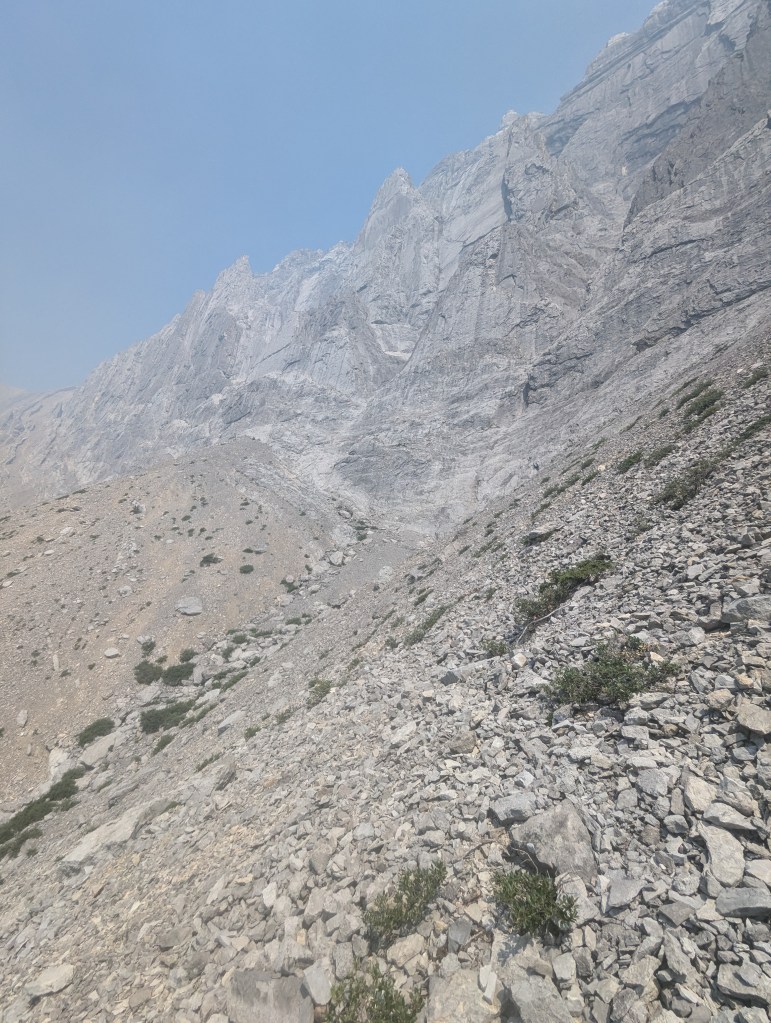
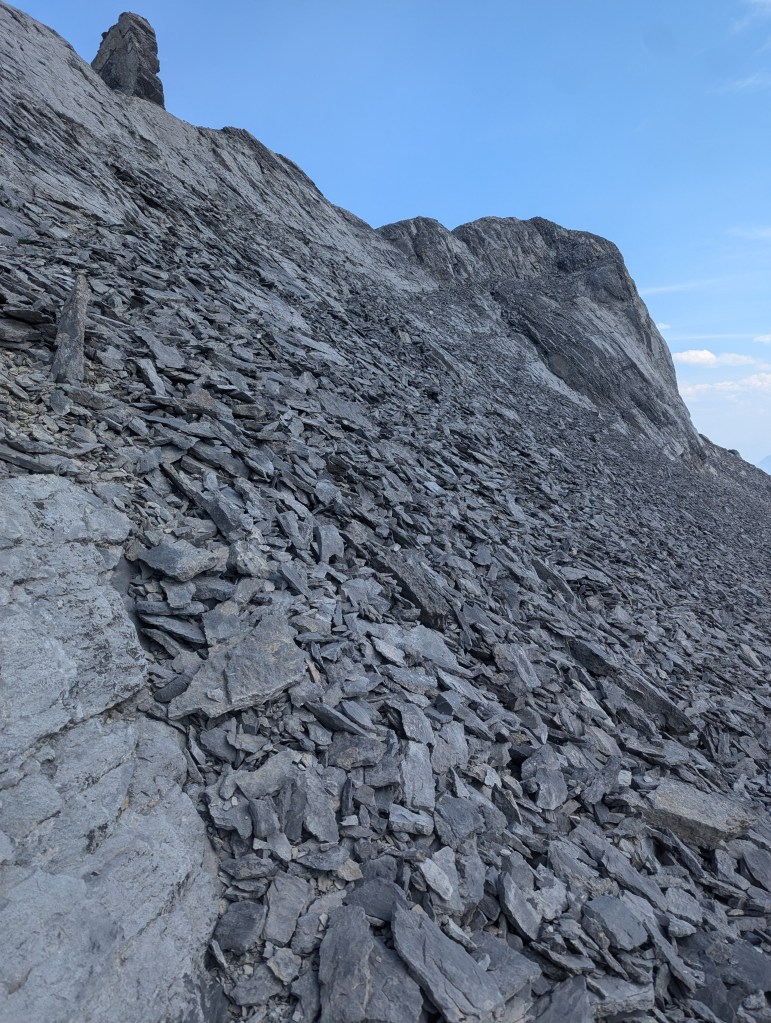
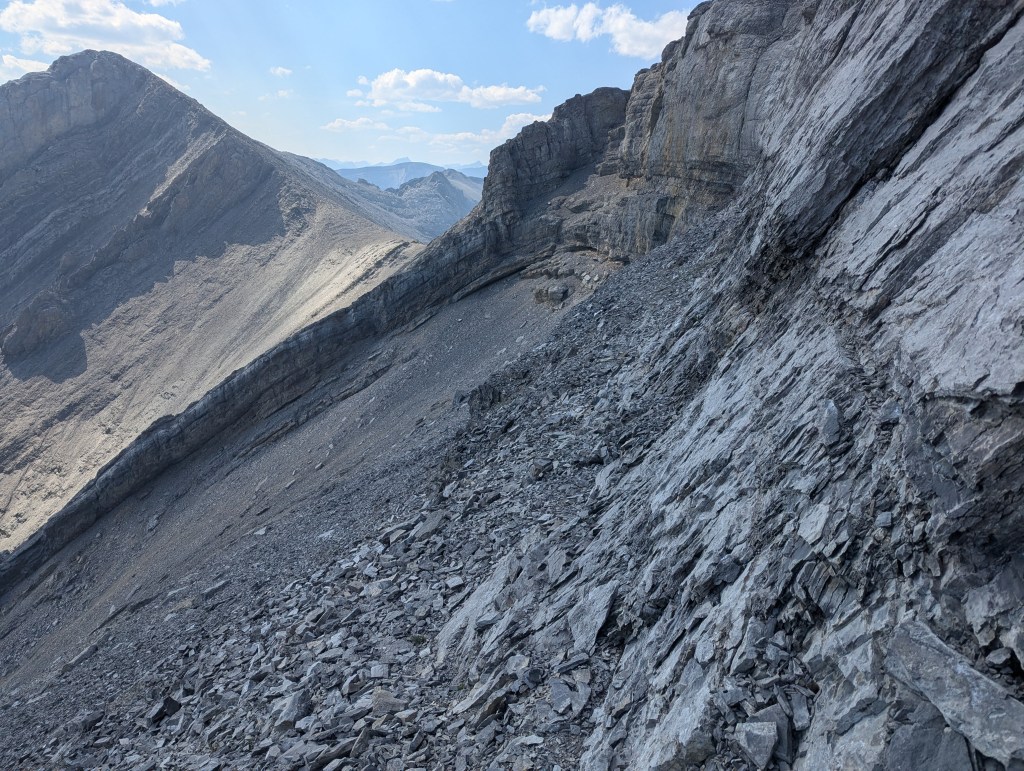
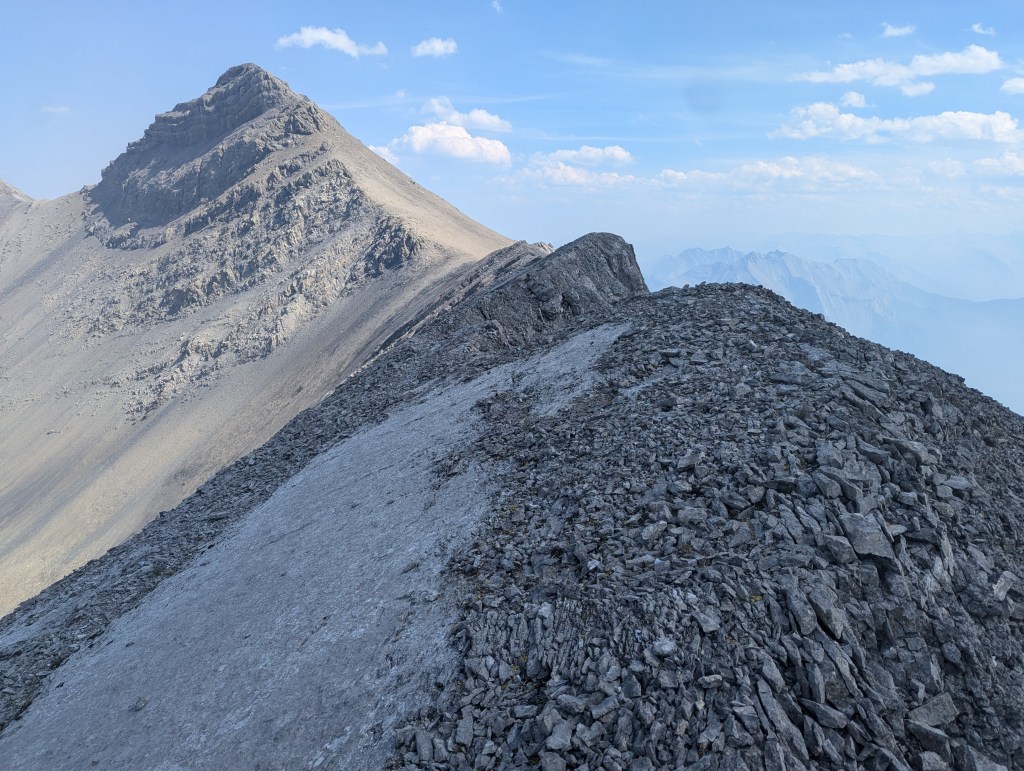
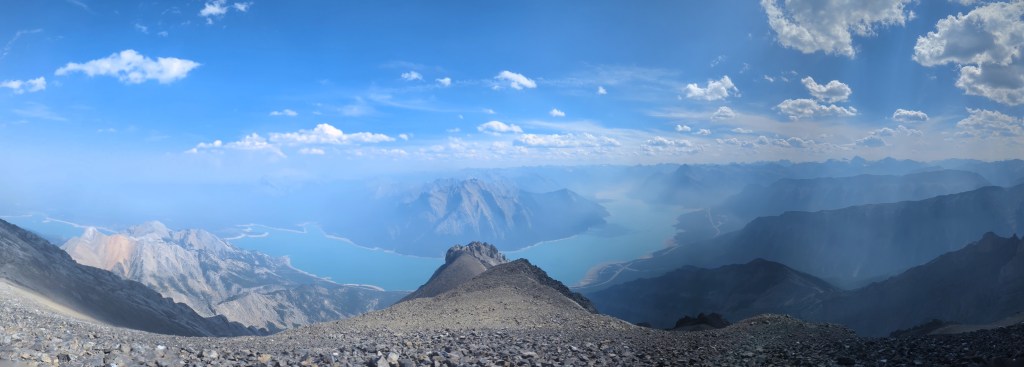
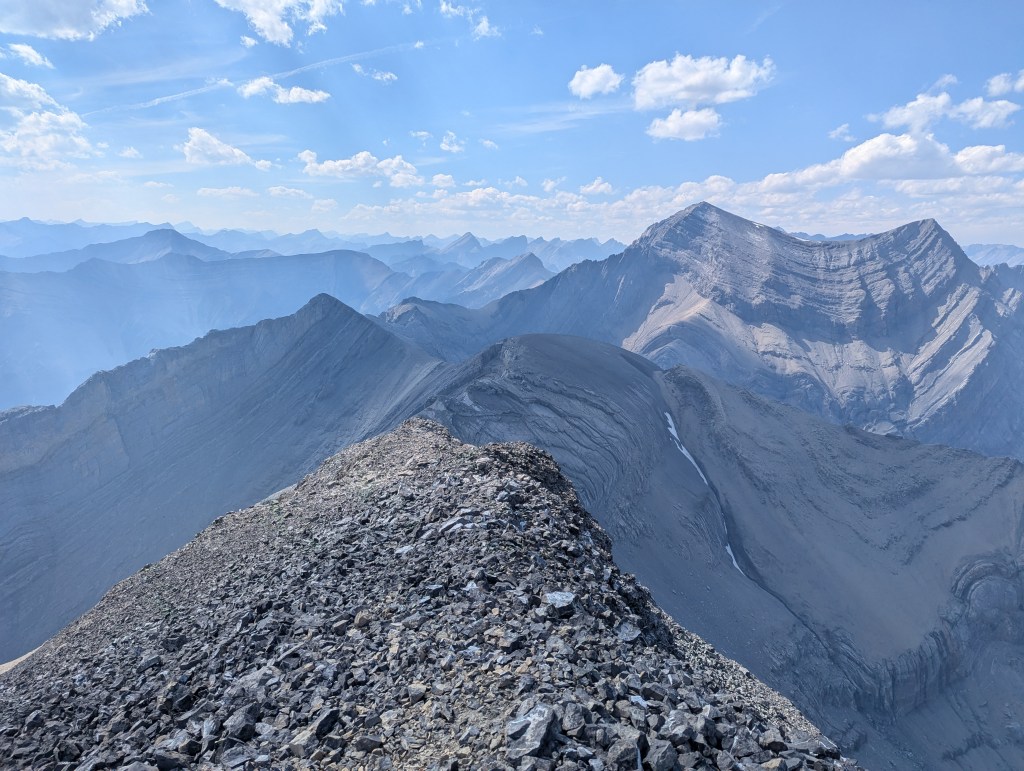
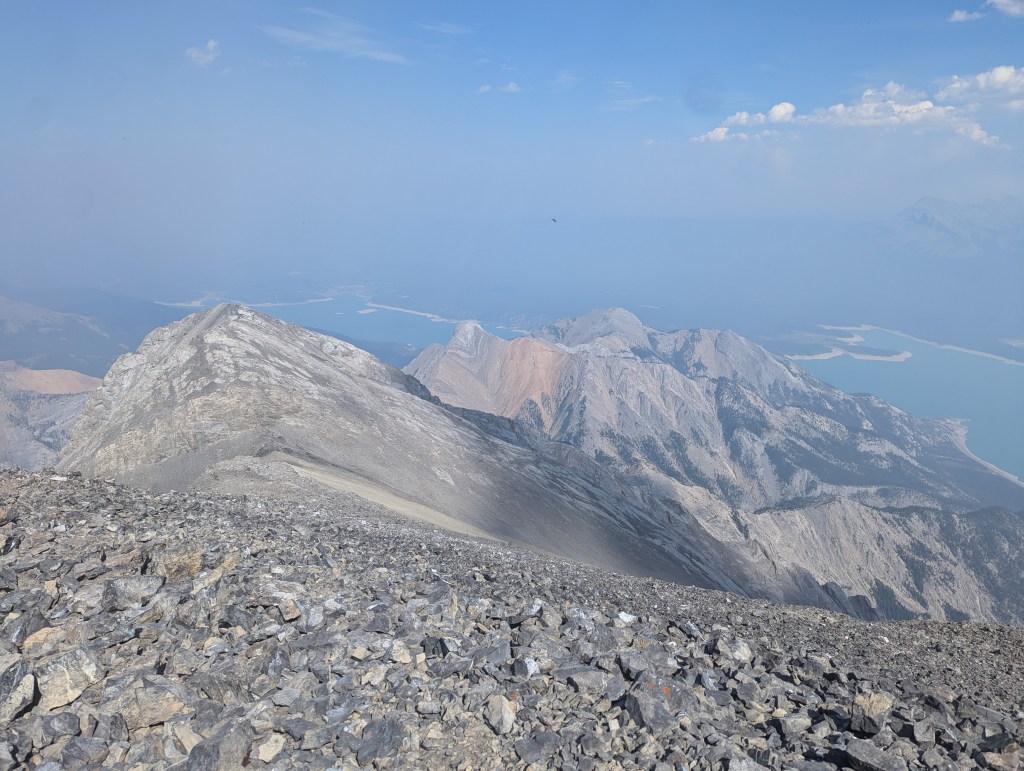
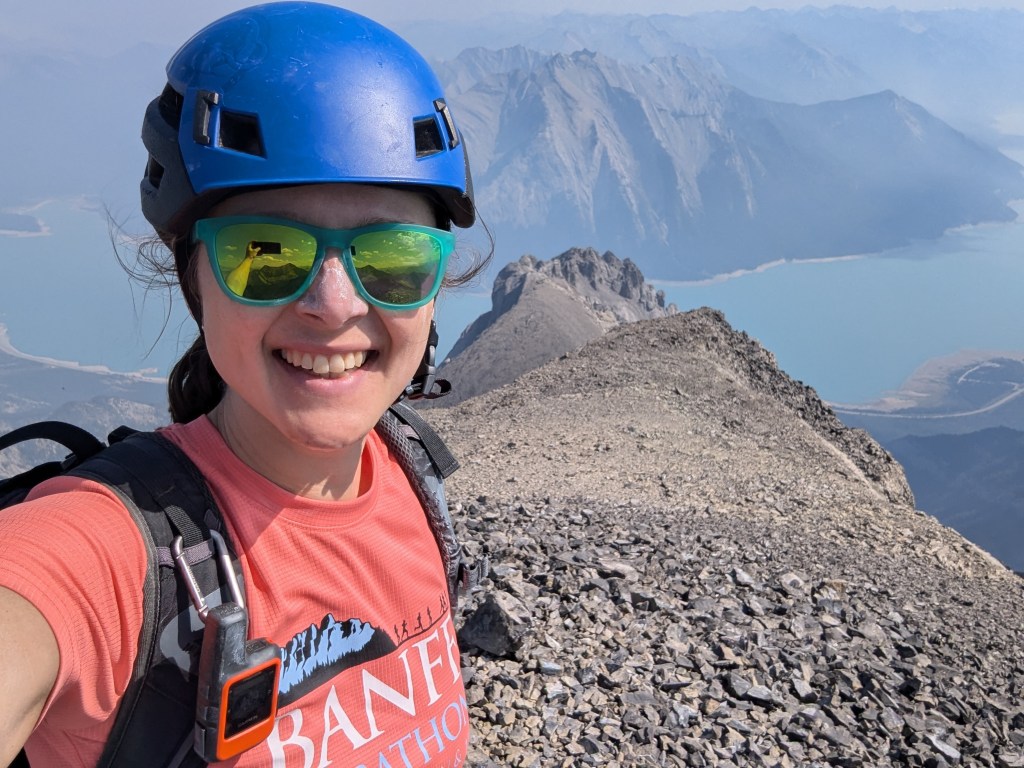
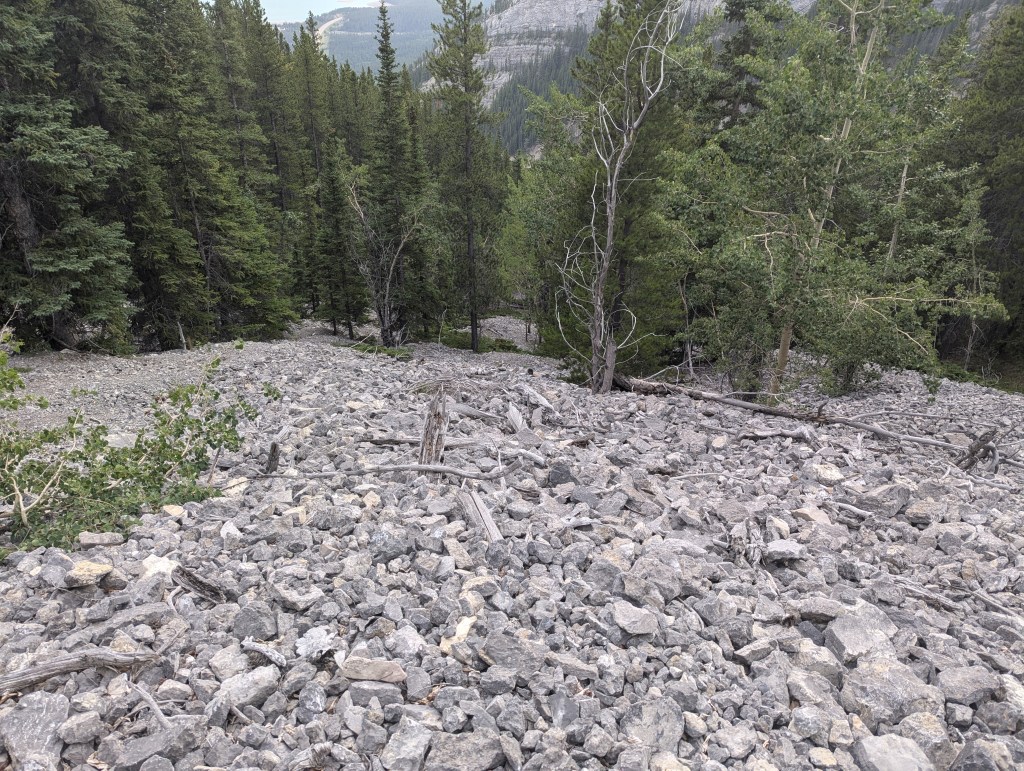
The view of Abraham Mountain from where I parked on the road. The creek approach starts at the right side of this photo, near the diamond-shaped road sign. A faint trail leads to the treed hump at the center of the photo, gaining which leads to the base of the cliffs. A tedious traverse below the cliffs leads to the col at the left side of the mountain. The final push from the col to the peak is shorter than it looks from this angle.There was a faint trail to follow on high ground to the right of the creek.The trail seems to end at a washout featuring still-forming hoodoos. I kept high and hiked behind the burgeoning hoodoos, turning right at flagging tape along the edge of a small gravel drainage. The trees along the drainage were thin and easy to navigate for the trek up. On the way down, the gravel drainage made for a faster descent at times. Steep parts of the drainage higher up are easily bypassed in trees to climber’s left (cairns and faint trails).Trending too far left only leads to slabby cliffs. The slab ahead is steep and exposed with a loose dusting of gravel – not a viable route option. Instead I continued up through the trees until I was above this large network of slabby drainages. Surprisingly, I ran into another group at the top of this slope who had hiked in via Abraham Slabs.Once above the slabby cliffs, a long traverse cross many drainages begins. This is the first one encountered. An ok-looking line exists midway up this photo. But, I was scrambling solo and opted for the absolute easiest possible line, requiring a bit of elevation loss.At this next drainage I, again, dropped down for the easiest crossing. Not far from here a section of steep, bald slab is encountered and the only obvious line is to gain elevation and cross on an easy shelf above the slab. For all other drainages I lost elevation at each crossing.The drainage with this scree chute marks the end of technical terrain for the traverse. Beyond this point it’s less critical to keep high and game trails exist lower on the slope to ease progress.Crossing yet another drainage. The broad gravel drainages further back on the mountain seemed to require slightly less elevation loss and regain if crossed slightly lower down on game trails, as opposed to hugging the cliff.Looking ahead, the scree slope leading to the col on the summit ridge looks to be getting closer. The ascent slope is at center, just above the drainage.But first, another two drainages must still be crossed.I started up the scree slope a little over three hours into the trip, feeling like I was doing alright for time. The terrain at the right side is relatively stable, far from the worst I’ve done. This is roughly where I began rationing my water.My forced smile betrays my true feelings here: I spent two hours groveling up this scree slope. Two additional drainages are crossed within the scree slope, requiring elevation loss and regain each time. The route is largely sheltered from any breeze and I was baking in the hot sun. The scree slope eventually ended, despite my fears that I would reach my turn around time still dragging myself up this endless slope. Looking back, the day that had started with fairly clear skies had now darkened from the smoke of wildfires to the north.As the scree slope curves around to the right, a subtle ramp can be spotted to climber’s left, leading to the summit ridge.Looking back from the same point as the photo above. The scree slope, my ascent slope, rises from the bottom-left corner, below the cliffs.Once upon the summit ridge, the path to the summit came into view. It’s only 30 min to the peak from here. The walk isn’t quite as trivial as this view would indicate, but I did feel it stayed within the realm of moderate scrambling. There was one move of downclimbing to climber’s right that felt a bit airy, but was sheltered above a small shelf. If at all damp or snowy though, this ridge would be too exposed to attempt without a rope, ice axe, and crampons.A smoky summit panorama, looking across Abraham Lake. Mount Michener stands at center.Looking northwest to Allstones Peak (not to be confused with the peak of Allstones Ridge), easily the highest point in the corridor.To the east lies the fun little loop of Windy Ridge, The Buckle, Talus Peak, and Humpback Ridge. The closer ridge at the right is Hoodoo Ridge. Despite appearances from this angle, it does not connect with this route.Victory selfie at the peak of Abraham Mountain. No sunburns were had on this day, thanks for asking!The descent back down the scree slope was virtually effortless compared to the ascent. Smoky skies had cleared somewhat by this point. The sun had shifted now, too, creating a good shaded break. By the bottom of the slope though, I had unfortunately run out of water. By mid-summer this route has no drinkable water sources, and the 2 L I had started out with did not last the full trip.The traverse back out across the many drainages was no faster than on the way in. My GPS watch proved handy for spotting the turn-off to my ascent drainage. Without a navigation aid, the walk-off via Abraham Slabs is probably the more intuitive line.
I made it back to the road in 10 hours, grateful for the extra water I’d stashed in my vehicle! Abraham Mountain is a beautiful summit and a rewarding peak to have bagged. I tend to agree with DeWit that it can be done as moderate scramble through careful route choice. Many opportunities for difficult scrambling exist and this route might be best suited to more experienced parties.


thank you for your detailed account and pictures it was helpful. This was a tough one🙏🏻
LikeLike